Skip to content

How to Choose the Right Hinged Shower Screen?

Choosing the right Hinged Shower Screen starts with your bathroom, not a showroom photo. Measure the opening at the top, middle, and bottom; walls can be slightly uneven. Then check how far the door will swing. A towel rail, vanity, or toilet may sit directly in its path. Small details matter.

Think about daily use, too. A wider opening can feel more comfortable, while a compact bathroom may need a door that opens outward only when space allows. Check the product’s stated installation range and whether the hinges suit your wall and screen layout. Safety glass, sturdy hardware, and well-fitted seals are important features, but quality can vary between products. Ask for clear specifications rather than relying on appearance alone.

Cleaning is part of the decision. Fewer awkward corners can make wiping the glass easier, though no screen stays spotless without care. Look closely at hinge design, handle placement, and the bottom seal. Imagine stepping in with wet hands, not just admiring the finish. That sounds obvious. It is often overlooked.

Installation deserves honest thought. Walls may need adjustment, and a screen installed out of level can affect how the door closes. Follow the manufacturer’s instructions, and use a qualified installer if the fitting is beyond your experience. I would not choose a model based only on the lowest price; replacement parts and clear warranty details deserve a look. There is no perfect screen for every bathroom. A careful match between available space, practical features, and reliable product information usually leads to a better choice.
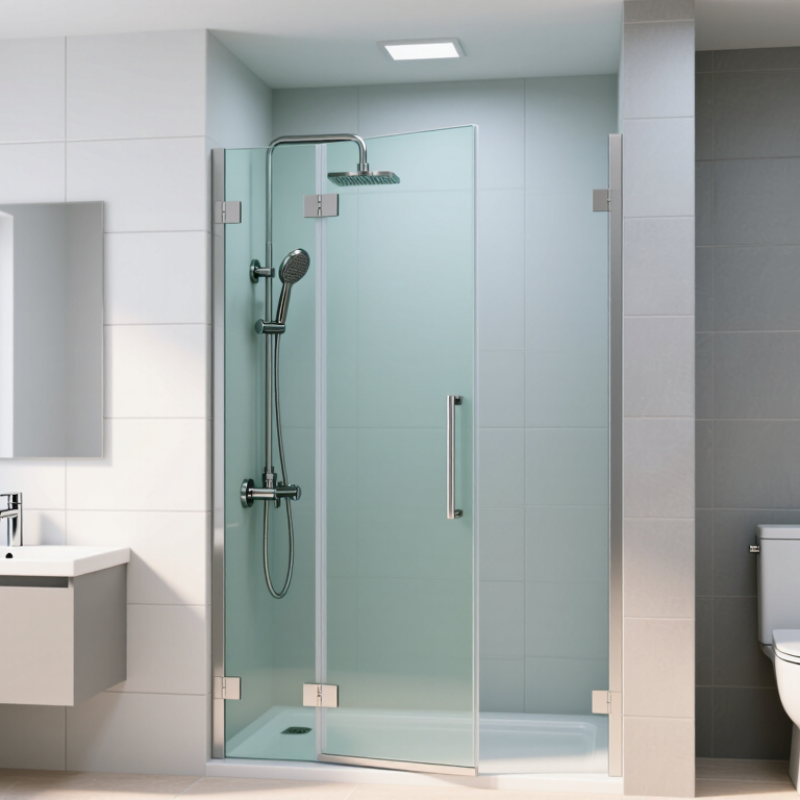
How to Choose the Right Hinged Shower Screen?

Understand How Hinged Shower Screens Work

A hinged shower screen uses fixed glass panels, hinges, seals, and a shower door. The hinges carry the door’s weight and control its movement. Unlike a sliding screen, it needs clear floor space beside the shower entrance. Measure that space with the door fully open, not only when closed.

In practical installations, the wall must be strong and reasonably level. Hinges usually attach through reinforced wall areas, while seals reduce water escaping around the glass. The door may swing outward, inward, or both ways, depending on the design and local safety requirements. Always check the installation instructions. A door that opens into a narrow vanity area can become awkward, even when the measurements look correct.

Glass thickness affects weight, stability, and hinge performance. Thicker glass feels solid, but it also demands accurate fixing. I once saw a screen fitted against a slightly uneven wall, and the door slowly drifted open. The problem was not the glass. It was poor alignment. That detail is easy to miss. Leave clearance around nearby taps, shelves, and heated towel rails. Also inspect the bottom seal after installation. It should touch the tray without dragging heavily. If the hinge feels stiff or the seal folds, adjust it early rather than forcing the door.

Measure Your Shower Area and Check Door Clearance

How to Choose the Right Hinged Shower Screen?

Measure Your Shower Area and Check Door Clearance

Measure the finished wall surfaces, not the rough construction opening. Record the width at the top, middle, and floor level. Walls are rarely perfectly parallel. A small difference can create a noticeable gap around a hinged shower screen.

The 2024 Houzz U.S. Bathroom Trends Study reports that roughly one-third of renovating homeowners enlarged their showers. That trend makes accurate planning more important. Measure the shower width, depth, and ceiling height before choosing the screen. Then mark the proposed door swing with masking tape on the floor. It should clear the toilet, vanity, towel rail, and nearby wall. A door that technically opens may still feel awkward in daily use.

Check the entry width against local building requirements and the installer’s recommendations. The National Kitchen and Bath Association commonly uses a 30-by-30-inch shower compartment as a planning reference. However, this is not a substitute for local code. Keep handles away from wall corners and allow space for adjustment. Hinges need a firm, level fixing surface, especially on tiled walls. Measure twice. I still find that one overlooked skirting board can change the whole clearance calculation.

Leave practical space outside the screen for standing and drying. Water can escape when the door opens inward. An outward-opening option may improve access, but it needs an unobstructed path. Review the layout at eye level and floor level; the drawing may look right while the real bathroom does not.

How to Choose the Right Hinged Shower Screen? - Measure Your Shower Area and Check Door Clearance

Measurement or Check How to Measure or Assess Typical Planning Range Why It Matters
Finished opening width Measure the distance between the finished wall surfaces at the top, middle, and bottom. Record the smallest measurement. Common hinged-screen widths are approximately 600–900 mm, but the actual opening determines the suitable size. Walls may not be perfectly parallel. Using the smallest width helps prevent installation and sealing problems.
Finished height Measure vertically from the finished shower floor or tray surface to the intended top of the screen at both sides. Many residential screens are around 1,900–2,100 mm high. The height must suit the ceiling, shower fittings, waterproofing layout, and available glass-panel sizes.
Wall out-of-plumb variation Use a spirit level or laser level to check whether each wall leans. Measure the difference from top to bottom. Small variations may be accommodated by the wall channel or hinges; larger variations require product-specific adjustment details. A hinged door needs a reasonably straight hinge line to close correctly and maintain an even seal.
Door opening direction Identify whether the door will open inward, outward, or both ways, depending on the hinge design and local requirements. Outward opening is commonly preferred where permitted because it allows easier access in an emergency. The opening direction affects safety, usability, nearby fixtures, and the position of the handle.
Door swing clearance Mark the door arc on the floor using the planned hinge pivot and door width. Check the entire swing path. Keep the full swing area free from toilets, basins, cabinets, radiators, and towel rails; use the manufacturer’s minimum clearance. Even a small obstruction can stop the door from opening fully or cause glass and hardware damage.
Nearby fixture distance Measure from the closest edge of the proposed door path to every fixed sanitary fitting and furnishing. Use the fixture manufacturer’s and local building-code requirements; do not rely on a universal clearance figure. Required space varies by jurisdiction, fixture type, accessibility needs, and the selected hinge system.
Shower tray or floor slope Check that the tray or floor is level across the threshold and slopes toward the drain without creating a door collision point. The screen should sit on a stable, properly waterproofed surface; exact tolerances depend on the system. An uneven base can cause the door to drop, drag, leak, or place stress on the hinges and glass.
Glass panel width and weight Confirm the selected hinge is rated for the glass thickness, panel width, and total door weight. Tempered safety glass is commonly supplied in approximately 6–10 mm thicknesses for shower screens. Hinge capacity and fixing method must match the glass specification to support safe operation.
Handle position Mark the handle location and check that it can be reached without touching a wall, fitting, or sharp edge. Place the handle at a comfortable height and follow the selected hardware’s drilling template. A suitable position improves access and prevents the handle from striking adjacent surfaces.
Water containment Check the door overlap, seals, threshold, fixed panels, and showerhead direction. Keep water away from the opening. A hinged screen should be positioned so normal spray is directed toward the drain, not directly at the door gap. Correct positioning reduces splashing, floor damage, mould risk, and maintenance issues.
Wall fixing locations Locate studs, masonry, or suitable reinforcement before drilling. Avoid relying only on tile or plasterboard. Fixings must be selected for the wall substrate and the load imposed by the glass and hardware. Proper structural support helps prevent movement, cracked tiles, loose fittings, and unsafe installation.
Final verification Recheck all dimensions after tiling, waterproofing, grouting, and installation of the shower tray or finished floor. Use the finished dimensions rather than rough-in dimensions when ordering the screen. Finishes can change the opening size and may affect the final door alignment and clearance.
Measurement note: Dimensions and clearances vary by screen design, hinge capacity, wall construction, accessibility requirements, and local building regulations. Always compare the finished site measurements with the installation instructions for the selected hinged shower screen.

Compare Glass Types, Frame Styles, and Hardware

Choosing the right hinged shower screen starts with the glass. Clear tempered glass keeps a small bathroom bright and open. It also shows water marks quickly, so regular cleaning matters. Textured or frosted glass offers more privacy and hides minor splashes better. Laminated safety glass can provide extra security, but it is usually heavier and more expensive. Always confirm the glass meets applicable safety standards in your area.

Frame style changes both appearance and maintenance. A fully framed screen has strong perimeter support and better tolerance for uneven walls. It suits practical renovations. Semi-frameless designs look lighter while retaining support around key edges. Frameless screens create the cleanest visual effect, but wall accuracy becomes critical. A few millimetres can affect door movement. I once assumed a wall was square and regretted it.

Measure carefully.

Hardware deserves equal attention. Hinges should match the glass thickness and door weight, while handles need a comfortable grip with wet hands. Stainless steel and solid brass generally offer dependable strength, but the finish still needs proper care. Check the hinge swing before installation. The door should open without striking a vanity, toilet, or towel rail. Seals and a low-profile threshold help control water, although they cannot correct poor drainage. A qualified installer can check wall reinforcement, clearances, and fixing points before drilling. That small inspection may prevent costly adjustments later.

Choose a Hinge and Opening Direction for Your Layout

Choosing a hinged shower screen starts with the room’s movement patterns. Measure the shower width, ceiling height, nearby basin, toilet, and entry door. Then mark the proposed swing with masking tape on the floor. Stand inside the marked area. Can you exit without twisting around the door? This simple check often reveals problems that drawings miss.

The hinge side should provide a firm, vertical fixing point. A wall with solid framing usually offers better support than a thin partition. Check where pipes and electrical services run before drilling. The door may open inward, outward, or both ways, depending on the hardware and local safety requirements. In a compact bathroom, an inward swing can save circulation space. However, it must not reduce comfortable entry. An outward-opening door needs clear floor space and should not strike furniture or another door.

Think about water control as well. Position the hinges and seals so water falls back into the shower area. A slight threshold or carefully planned slope can help, but it is not a cure for poor alignment. From installation experience, even a few millimetres can affect sealing. I once underestimated the skirting board depth, forcing a hinge adjustment later. That mistake was avoidable. Recheck every dimension after tiling, because finished surfaces may differ from the original plan. Choose the opening direction only after considering daily use, cleaning access, emergency access, and future mobility needs.

Match Installation Needs, Safety, and Maintenance Requirements

How to Choose the Right Hinged Shower Screen?

Choosing a hinged shower screen starts with the installation site, not the showroom finish. Measure the opening at three heights, then check whether the walls are plumb. Even a small alignment error can make the door drag against the seal. A professional installer should inspect tile strength, stud positions, floor slope, and hinge clearance before ordering. For uneven walls, adjustable hinges or compensating profiles may provide a safer fit than a minimalist frameless design. It costs more sometimes.

Safety deserves careful attention. The World Health Organization reports about 684,000 fatal falls worldwide each year. This figure is not shower-specific, but it shows why wet-area access deserves serious planning. Choose certified safety glass that meets applicable standards, such as CPSC 16 CFR Part 1201 in the United States. Select hinges rated for the glass thickness and door weight. The door should open outward where required, without striking a basin or toilet. Confirm local building requirements before installation.

Maintenance needs equal consideration. Hard-water deposits collect around hinges, seals, and the bottom edge. A smooth surface and replaceable seals reduce cleaning effort. Wipe the glass after bathing, then inspect screws and seals monthly. Use non-abrasive cleaners; harsh chemicals can damage finishes and rubber components. I would not assume “low maintenance” means maintenance-free. Even a well-installed screen can develop loose hardware when cleaning habits are inconsistent. A small drip is worth investigating early.

How to Choose the Right Hinged Shower Screen

Glass thickness affects panel weight, so it matters when checking hinge capacity, wall fixings, and installation requirements.

Approximate glass weight per square metre, calculated using a glass density of 2,500 kg/m³. Actual panel weight varies with glass composition and dimensions. Confirm hinge and fixing limits with the screen manufacturer and installer; use safety glazing that complies with local requirements. Smooth, accessible surfaces can make routine cleaning easier.

Scroll To Top